Standard Shiplap Sizes & Dimensions: The Ultimate Guide
September 12, 2020
By: The Finished Space
Shiplap boards allow you to quickly, easily, and inexpensively add personality and charm to any room or space. The size and dimension of the shiplap, along with its orientation on the wall or ceiling, can add rustic, farmhouse, modern, or even sophisticated elements to your home. You can choose from a variety of styles and you don't need a professional to install shiplap - just a few tools and as little as one day of your time.
What is Shiplap?
For years, sturdy shiplap boards were an excellent product for building barns, sheds, and other practical structures. However, the numerous benefits of shiplap, in solid wood or medium-density fibreboard (MDF) make it a beautiful interior wall choice for today's homes. Shiplap is traditionally composed of planks with grooves that allow each piece to stack and tightly fit together. This is also how Shiplap achieves its signature look, exposing a thin line of indentation between each plank. Modern shiplap doesn’t necessarily abide by these same rules though. As the style has gained popularity, new materials and installation processes with lower maintenance are often preferred.
The History of Shiplap
The first use of shiplap boards dates back to a shipbuilding process called clinker construction during the Viking Age. Clinker construction created a watertight boat by overlapping wood boards over the hull. The watertight boards allowed vessels to sail across oceans safely. Unfortunately, the natural wood exterior of these ships required lots of maintenance. Eventually, as more weather-resistant materials became available, shiplap fell out of favor.
During the early 20th century, shiplap made its way indoors for its sturdiness, not its looks. Builders installed shiplap between a home's exterior and its structural framing. They would then cover the shiplap's seams with cheesecloth or muslin to create a smooth backing for wallpaper and other interior wall coverings.
Today, homeowners love resilient shiplap's rustic-raw look. It can enhance most design styles from cottage to modern. Shiplap allows you to inexpensively and quickly add charm and personality to your home.
The Different Shiplap Panel Widths
The width of the shiplap on your walls or ceiling will affect the aesthetics and feel of the room. Fortunately, shiplap comes in numerous widths to best fit the interior design of your home; however, 5 ½-inch and 7 ¼ -inch are the most commonly used widths. You can use one width of shiplap board to create your home's style, or you can mix the widths to create a unique design.
5 ½ - inch
5 ½ -inch shiplap adds depth and texture, transforming a dull space into a place of interest. It can visually expand an area when installed horizontally, making a room look longer and more expansive, and installed vertically, it can make interiors look taller. 5 ½ -inch shiplap gives a room a contemporary-classic look, working well in bathrooms, foyers, or any medium-size room, along with accent walls, ceilings and wainscoting.
7 ¼ - inch
When covering large areas, opt for the 7 ¼ - inch shiplap board. This shiplap gives a modern farmhouse style and works well for large-narrow rooms, accent walls, long hallways, or expanded ceilings. The wide face makes it quick to cover a large area.
Installation
Easy to install shiplap boards can give your home a seaside cottage or farmhouse look or quickly transform a blank space into a spectacular focal point. Here are simple steps for installing shiplap boards on your home's interior walls and ceilings.
It’s important to know that before you start, you will need to open the boxes of shiplap and let it adjust to the room temperature and moisture for a minimum of 48 hours, then, if needed, apply primer and paint. IMPORTANT NOTE: Avoid getting paint in the grooves since it will interfere with how the boards fit together.
Homeowners most often install shiplap either on the walls and ceilings. Fortunately, quick and easy shiplap installation requires only a few tools, but is still best accomplished with two people.
Installing Shiplap on Walls

1. Mark the Studs in the Walls
Locate the studs in the walls with a stud finder, then using a level, draw vertical lines that follow the studs from the floor to the ceiling of the desired installation wall.
2. Prepare and Paint the Wall
Remove everything from the area where you plan to install shiplap, including nails, baseboards, moldings, trim, and wall plates. Run a utility knife along the top of the baseboard to remove the existing caulking from the wall. Pry the baseboard from the wall (near studs to limit damage to the drywall) with a crowbar or equivalent tool.
Make a paper template of any outlets, vents, plates or outlets. You will use the templates to cut holes in your boards before installing them.
Because of the signature gap between the shiplap's joints, we recommend painting the wall the same color as the shiplap.
3. Measure the Area to Determine How Much Shiplap You Will Need
To determine the square footage of the space:
Multiply the wall's length by height.
Add 10 percent to your total to account for errors and waste.
Divide the height of the wall by the width of the shiplap boards.
If you have to cut a board horizontally, place it at the bottom of the wall.
4. Installing Boards On the Wall
Install your first shiplap board on the wall, beginning at the floor. Then use your level to ensure a straight board. Make sure the board lays on or overlaps the vertical chalk lines that identify the walls' studs.
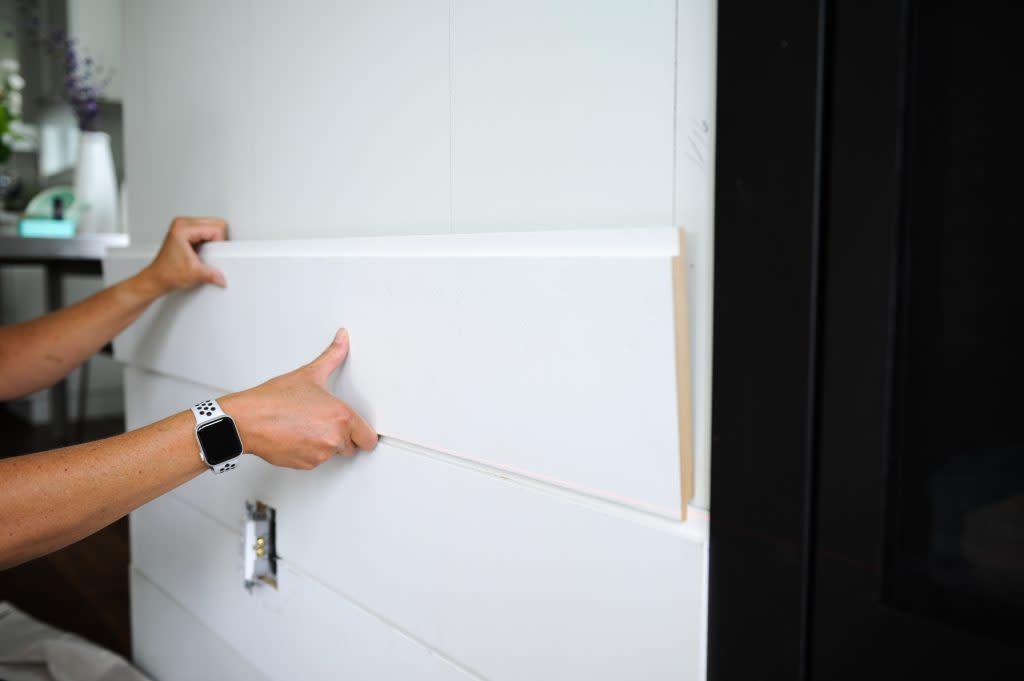
Nail the product to the wall at the studs (using the marked lines from step 1) with a nail gun (18 or 23 gauge). Install the second row of boards, staggering the joints.
Fill any gaps with caulking (using a caulking gun) along the adjoining walls (where the product meets the wall). Smooth out by running a clean finger down the bead of caulking.
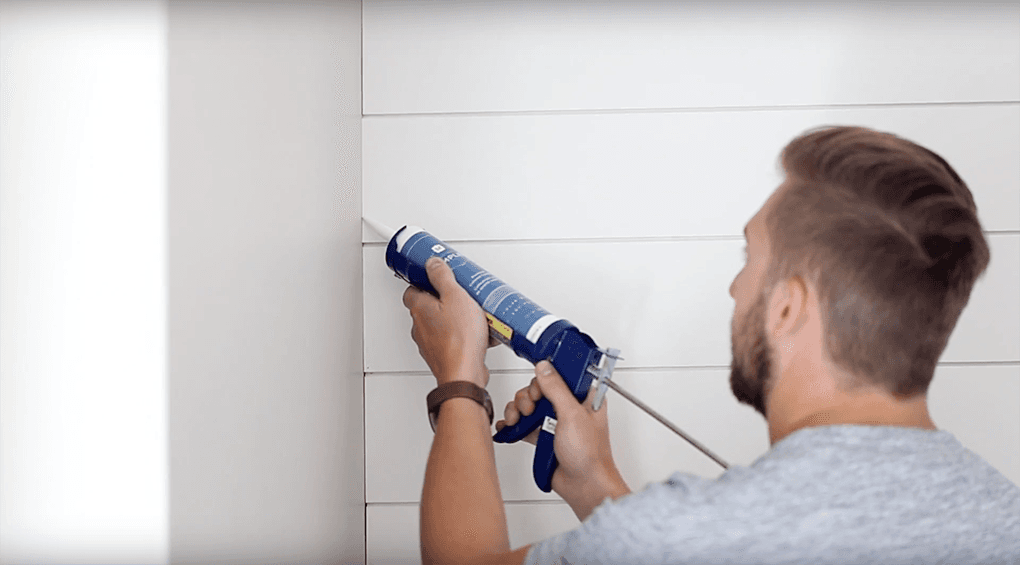
Fill nail holes with spackle and paint the gaps between each board with a paintbrush. Then, using a roller, paint the shiplap.
5. Attach Matching Moldings and Baseboards
Using finishing nails, install the baseboards and crown moldings to the walls.
Installing Shiplap on Ceilings

Designer: Coco & Jack | Photographer: Cameron St. Visual Storytelling
1. Prepare and Paint the Wall
Remove everything from the ceiling, including nails, trims, and light fixtures. If installing on drywall or plaster, paint it the same color as the shiplap.
2. Measure the Area to Determine How Much Shiplap You Will Need
To determine the square foot of the ceiling, measure its length by width. Add 10 percent to your total to account for errors and waste.
3. Attach Battens or Located Trusses
For installing shiplap on a drywall or plaster ceiling, fasten 1- X 2-inch battens directly to the ceiling with 2-½-inch screws. If installing into ceiling trusses, use a stud finder and mark the truss locations.
4. Installing Shiplap
Begin installing shiplap on the most visible side of the room. Place the first board flush against the ceiling and nail into the battens or trusses. Install the second row of planks, staggering the joints.
5. Installing Boards Around Light Fixtures
Always shut off electricity to the room at the breaker box. Hold the plank up to the ceiling outlet, mark the width and depth with a pencil, and then cut out the marked area with a jigsaw.
6. Fill Nail Holes and Touch Up Paint
For a clean look to your ceiling, fill nail holes with spackle and caulk any gaps and edges.
Orientation
How you orientate shiplap boards on the walls will impact the style and look of a room. You can often find shiplap that is oriented horizontally and vertically, but you can also install it diagonally or in a V-joint for added character. Shiplap provides you with endless design options.
Horizontal
Horizontally placed shiplap creates clean-straight lines and exciting texture, uplifting an entire living space with a contemporary farmhouse design. It also visually expands a space, making rooms appear wider and longer.
Vertical
Vertically installed shiplap draws your eyes up towards the ceiling. The vertical orientation also makes the interior look taller, giving an open and free vibe to the space.
Diagonal
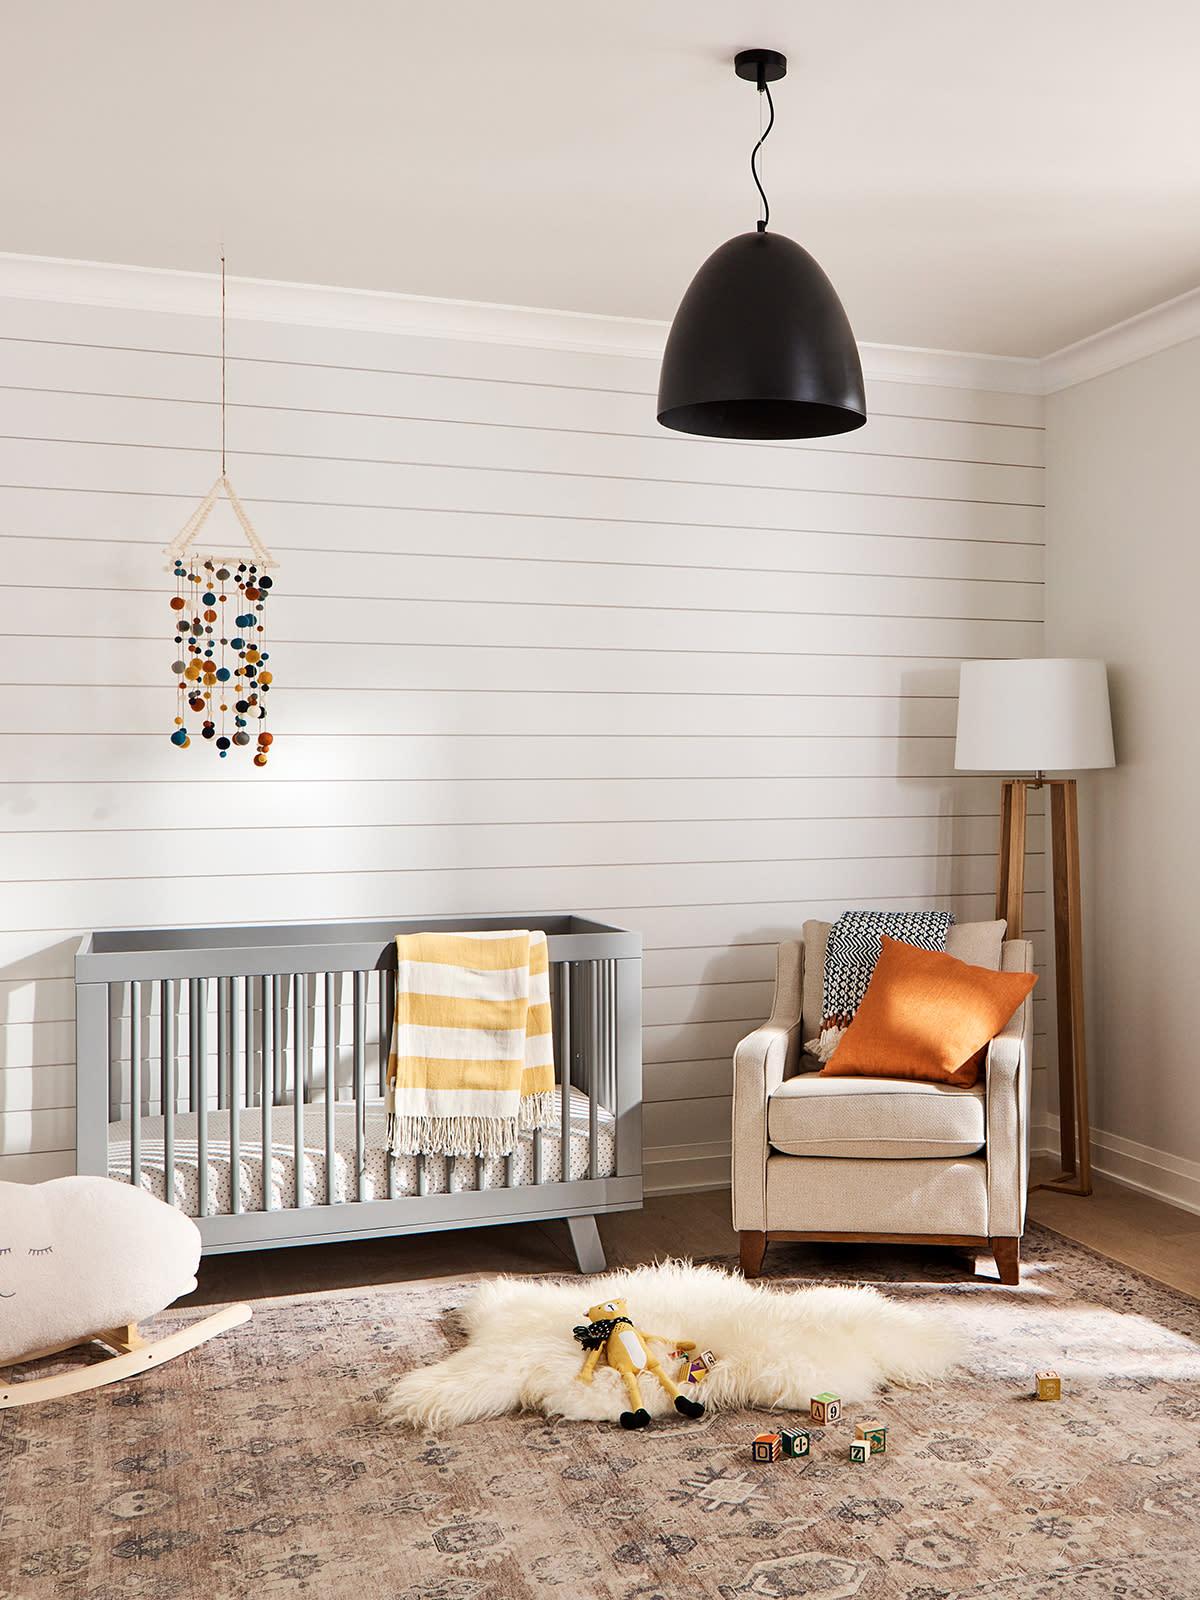
Diagonally installed shiplap adds energy and movement to a space, sure to stimulate your eyes and mind—an excellent choice for a children’s room or play area.
DIY-Friendly
DIY-friendly shiplap panels can help you quickly and easily transform any room or area into a charming, unique space you will love.
Required Equipment
With quality shiplap boards and a few power tools, anyone can install shiplap boards. For safety, you should also use safety goggles, a dust mask, and hearing protection.
Tools needed to install shiplap boards:
A Stud Finder
Pencil
Level
Utility Knife
Crowbar or chisel
Hammer
Nail Gun
Mitre Saw
Caulk Gun
Low-Maintenance
Shiplap has several benefits that make it low-maintenance. If your shiplap becomes damaged, you can easily and quickly fix it yourself with basic carpentry tools. You can also avoid the hassle of repairs and maintenance associated with drywall because the durability of shiplap makes it resistant to denting and stretching. Since shiplap dries out quickly, you also limit the worries and maintenance caused by unhealthy and damaging mold.
A Note on Dust Control
Dust can settle in the gaps and grooves of shiplap. If you want to control and minimize dust, you should choose shiplap with reduced spacing between the boards. You can further reduce dust by eliminating shiplap ledges as much as possible.
Choosing Between Primed, Pre-Painted, or Rustic
To hasten a shiplap project, homeowners can choose primed or pre-painted boards. For the true nature lovers, you can purchase rustic shiplap for a real wood look.
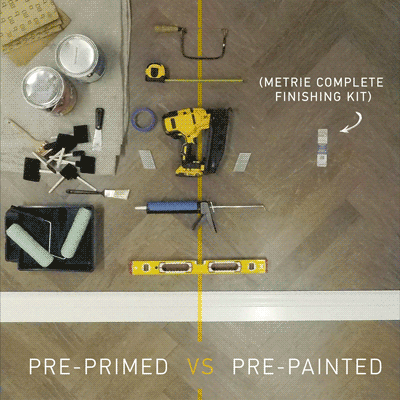
Primed
Primed shiplap boards save on installation time because they come already coated. All you have to do is pick a color and paint. Primed boards offer more consistent quality materials than rustic products.
Pre-Painted
Ready to install, pre-painted boards come primed and finished with a topcoat of paint. This means installations are a much faster and less messy than primed boards as you can skip the painting process.
Rustic
Natural or unfinished shiplap allows you to customize the wood’s look by picking a primer and paint or stain of your choosing. You may also leave the wood natural for a rustic raw finish.
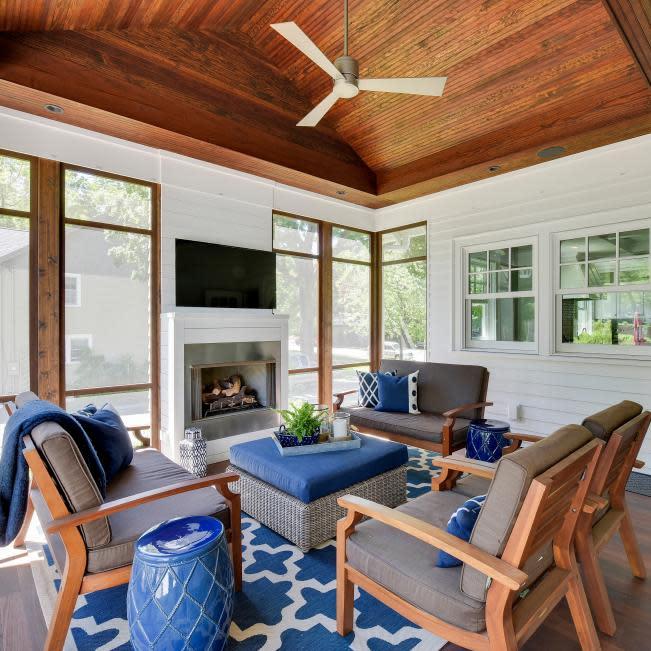
Best Rooms for Shiplap
Versatile and flexible shiplap works in any room, adding texture, depth, and warmth. With shiplap, you can personalize your home with unlimited colors and a variety of widths.
Kitchen
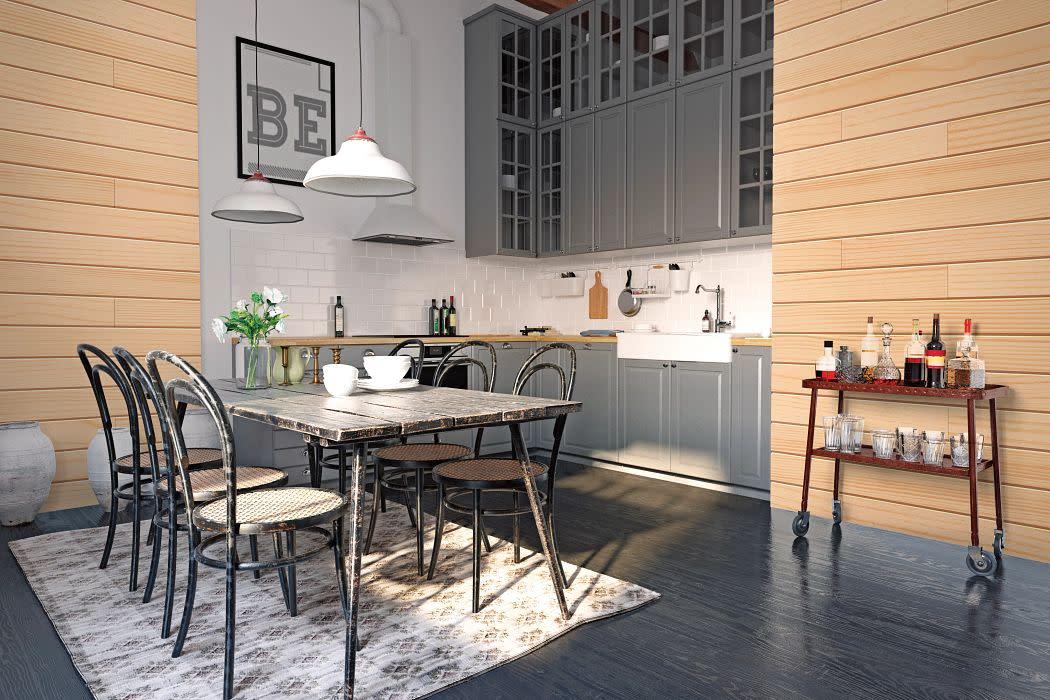
In a kitchen, vertical shiplap that contrasts horizontal shelving creates a modern yet farmhouse feel.
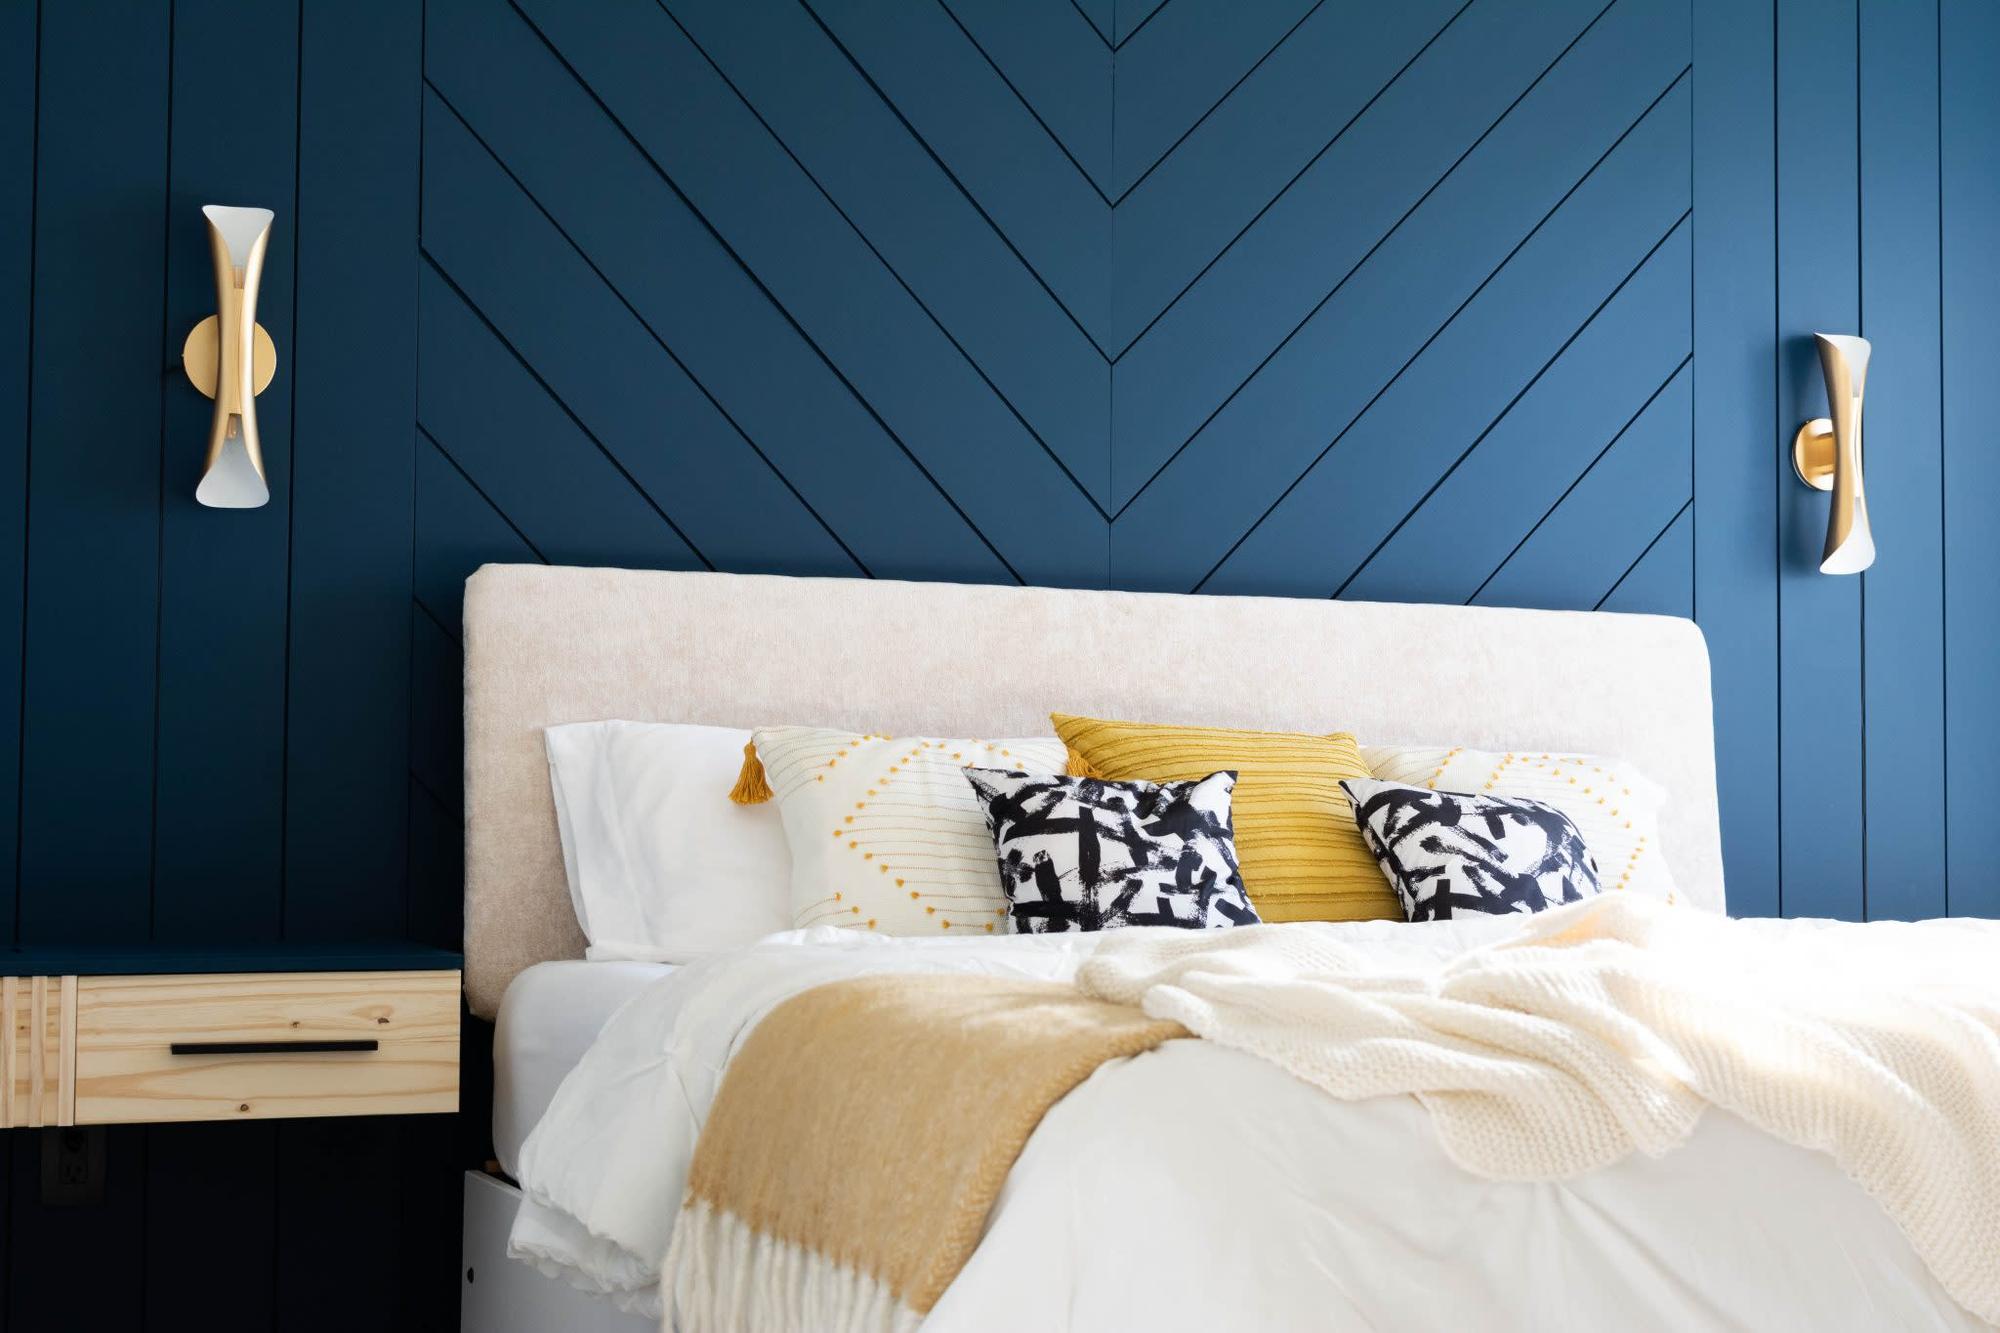
Bedroom
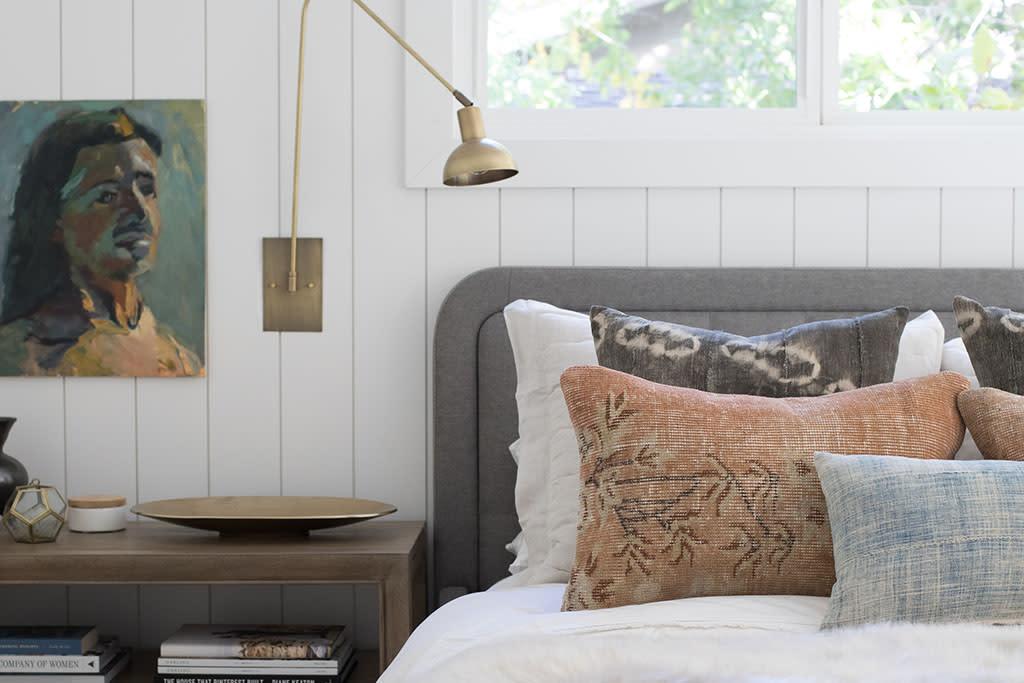
Brittany Chinaglia, of Brittany Makes & the Vintage Rug Shop
Shiplap allows you to add interest and character to your personal space. For instance, a painted shiplap accent wall adds colour and texture to your bedroom.
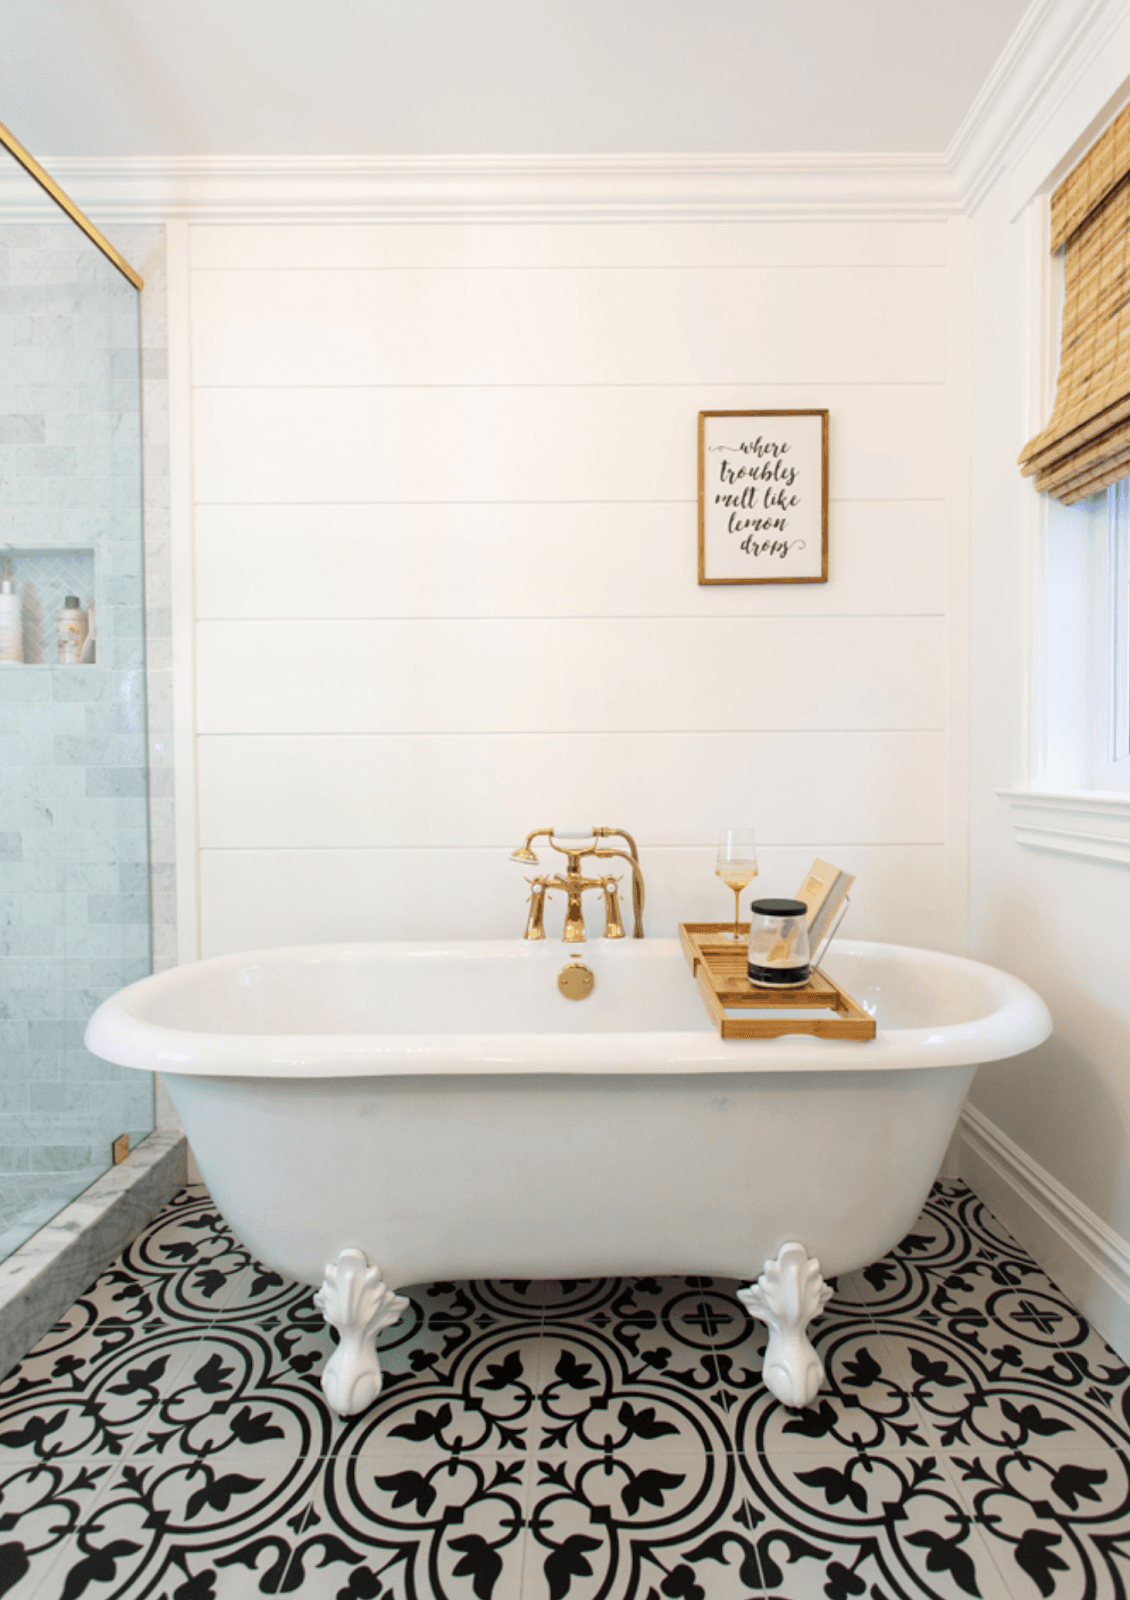
Bathroom
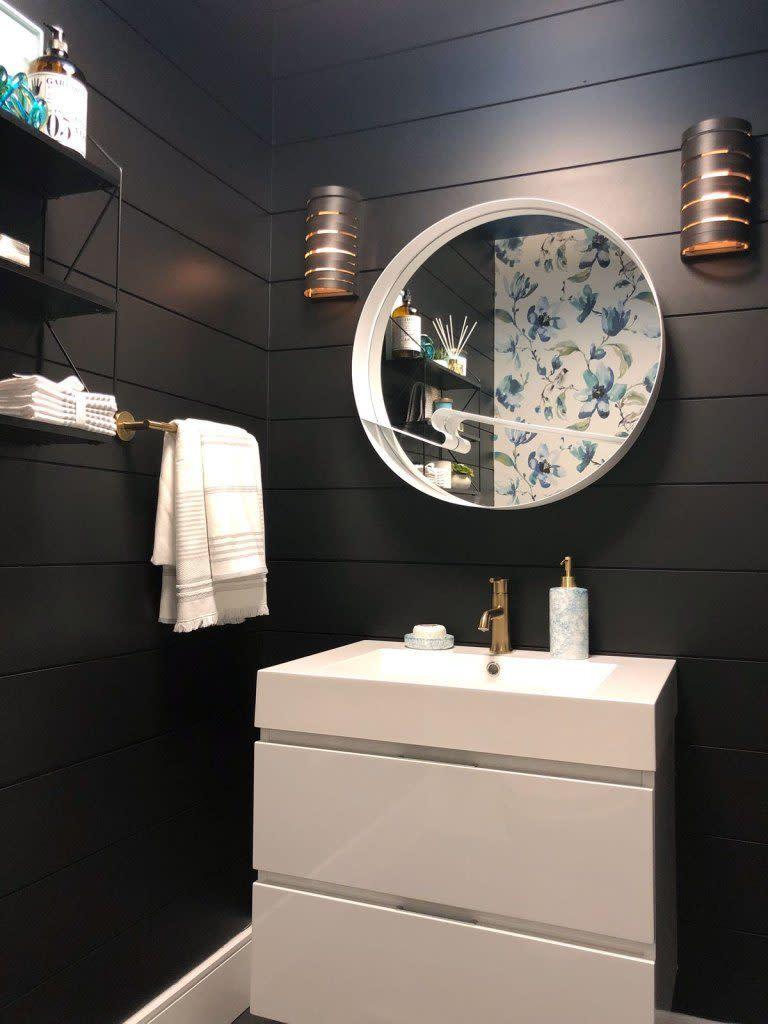
Installing shiplap in a bathroom makes an enormous impact by visually expanding a small space. However, do not install shiplap near standing water, like a shower, or excessive humidity, because shiplap will retain moisture, becoming damaged if not sealed completely. Metrie recommends priming cut ends of shiplap before painting or touching up, if using a pre-painted product.
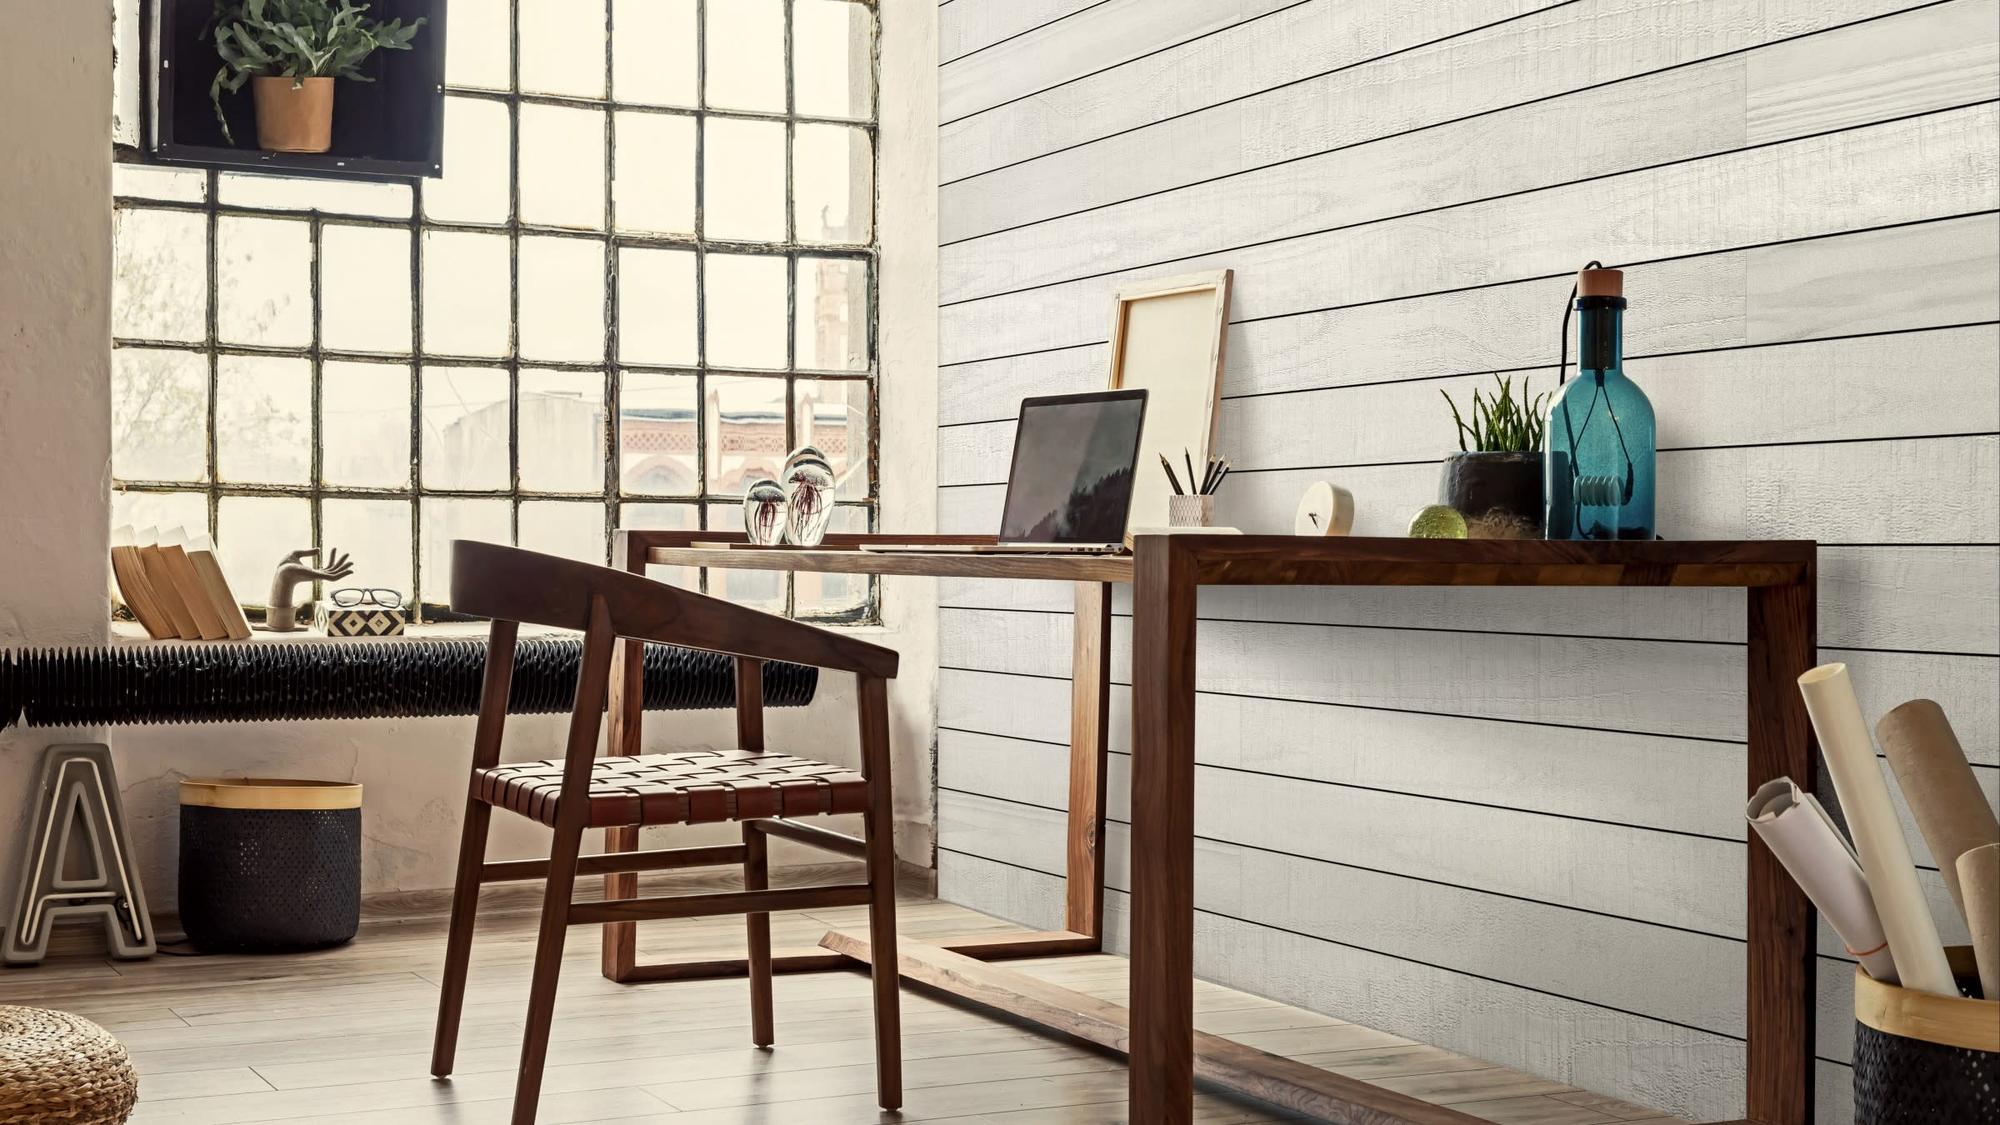
Office
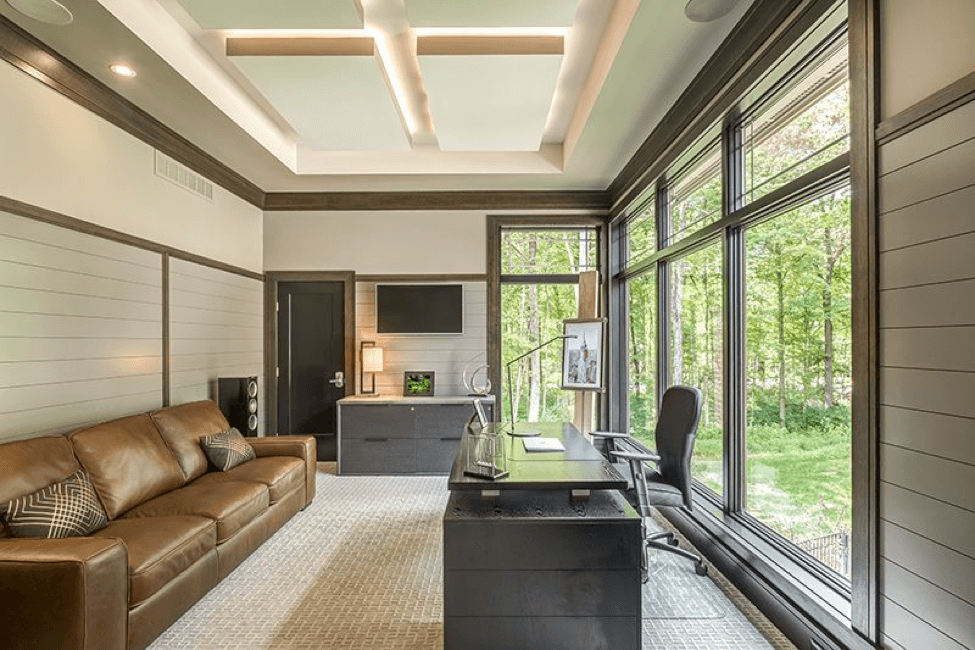
If you work from home, you want an office that is comfortable and stylish. Shiplap in a home office is a great way to stylize the space that you may be spending more time in nowadays.
Let Metrie Shiplap Help You Create the Home of Your Dreams
DIY-friendly, Metrie pre-primed or pre-painted shiplap boards can help you, in one short weekend, and at a low cost, transform your dull room into a unique and gorgeous space. Our shiplap boards come in various widths to help you create styles ranging from the modern farmhouse, bohemian, country, or industrial — whatever fits your desires. Low-maintenance Metrie shiplap resists denting and scratching for years to come.
Finish Fast with Metrie Complete® Pre-Painted Shiplap
Metrie Complete® Pre-Painted Shiplap allows you to transform a room in just one weekend. The shiplap boards come primed and painted in our patented Polar-White color, perfect for clean-modern decor. There's no priming, painting, or clean up—just install, and you're done.
Create an Accent Wall with Option {M}™ Modern Farmhouse Shiplap
Metrie’s Option {M}™ Modern Farmhouse shiplap produces walls with clean lines and minimal details. It’s a perfect solution for merging contemporary and rustic designs. Primed and ready for paint, you can choose any color to enhance your wall. You can further add to the Modern Farmhouse look by applying Metrie trim and door products from this group.
Please contact Metrie for more information on how we can help you enhance your home's aesthetics with shiplap.