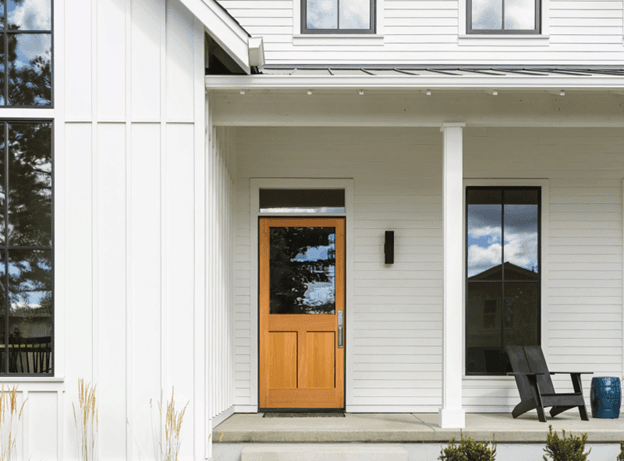
How to Replace an Exterior Door: Step-by-Step Front Door Guide
February 19, 2024
By: The Finished Space
When you think about replacing your front door, it often conjures images of security and privacy. In the rapidly evolving world of home design, the front door has transformed from just an entry point to an expressive design statement. Nowadays, they’re much more than barriers to the outside world.
Modern doors, with their sleek designs, unique materials, and advanced features, are fast becoming the centerpieces of contemporary homes. They allow homeowners to showcase their design aesthetics right at the doorstep. However, like all things in the design world, doors are super susceptible to wear and tear and can sometimes fall out of style.
This is why, beyond the undeniable requirements of security and privacy, there comes a time when you might need to replace your door. Fortunately, we’re here to help. That’s why we created this simple, easy-to-follow step-by-step guide to replacing an exterior door. Let’s get started!
A Step-by-Step Guide to Replacing an Exterior Door
Whether you’re looking to rejuvenate your entrance with a modern twist or restore its timeless charm, replacing an exterior door can be a transformative undertaking. Fortunately, it’s much simpler than you might think. Simply follow the steps outlined in the following guide, and you should be good to go!
1. Gather Your Tools and Materials
Once you’ve decided to make the change, it’s time to gather your tools, supplies, and materials. We recommend using something close to the lists below, depending on your door of choice.
Tools Required:
Utility Knife
Tape Measure
Hammer
Pry Bar
Nail Set
Miter Saw
Reciprocating Saw
Caulk Gun
2-ft. and 4-ft. Levels
Materials Required:
Flexible, Self-Sticking Membrane
Caulk
Minimal Expanding Foam
Backer Rod
Deck Screws
Finish Nails
Galvanized Casing Nails
Transition trim and moulding
2. Don’t Forget Your Door
The journey of replacing entry doors starts with the right inspiration. Before you can start installing your door, you need to choose your door. We recommend starting there.
Ask yourself some simple questions before you get started. What’s your design style? What kind of door best fits your design style? Are you looking for something with an intricate design or something more minimal? Aesthetics matter, but remember to think about durability and insulation. After all, you want this new addition to stand the test of time in both style and function.
3. Measure Twice, Order Once
It can’t be stressed enough: accurate measurements are the foundation of replacing your front door. Incorrect dimensions can lead to frustrating returns or adjustments that eat both time and money. Begin by measuring your existing door’s width, height, and thickness. Remember to account for any irregularities or slopes in the floor or frame, to ensure the perfect fit.
4. Ready, Set, Remove
Before the new door can be installed, the old one must be removed. Once you’re ready to install your new door, start by unscrewing the old door from its hinges. Remember that while the door might seem light, it’s always safer to work with a partner. Preserve any reusable hardware because vintage handles or quirky knockers can be repurposed, and can add a touch of nostalgia to your updated entrance.
5. Prep the Doorway
With the old door out, you have a blank slate. Before you dive into how to replace an exterior door, it’s essential to prepare. Clean out debris, especially at the doorway’s bottom, and remove old trim, moulding, and door jambs, ensuring that no remnants from the old installation interfere with your new door.
6. Fit Your New Door
Now, the moment you’ve been waiting for – introducing your new door to its new home. Align it within the frame, and check for any misalignments. If you have a pre-hung door, the process is slightly streamlined and super easy. If it’s not pre-drilled, take your time plotting out where the hardware should go, to ensure that functionality meets aesthetics.
7. Seal it Right
Once you have the door set in place, it’s time to focus on the finishing details. Your door’s seal is crucial, so next, you’re going to seal it. Proper sealing around your door safeguards your home from drafts, moisture, and even tiny invaders. Investing in quality sealing products, like a reliable door sweep, adjustable threshold, door jamb, and insulation, is non-negotiable.
8. Add the Finishing Touches
Once the door is securely in place, it’s time for the final touches. Apply the trim and moulding around the doorframe, install the hardware, and touch up any spots that need it, post-installation. Once you’ve done that, you’re good to go!
Looking for a New Door for Your Home?
Replacing exterior doors can revolutionize your home, and with the right materials, tools, and supplies, you can create a stunning entryway in as little work as possible.
Don’t settle for subpar products and half-completed work. At Metrie, we offer an incredible range of door options perfect for any design aesthetic. Contact us today to learn more!

